General System configuration
All basic settings required by an average company have been pre-configured when you first signed-up with erxes, feel free to check if they meet your business requirements. However, If you require more than what's available, please contact our customer service team for additional support.
Adjusting your general settings:
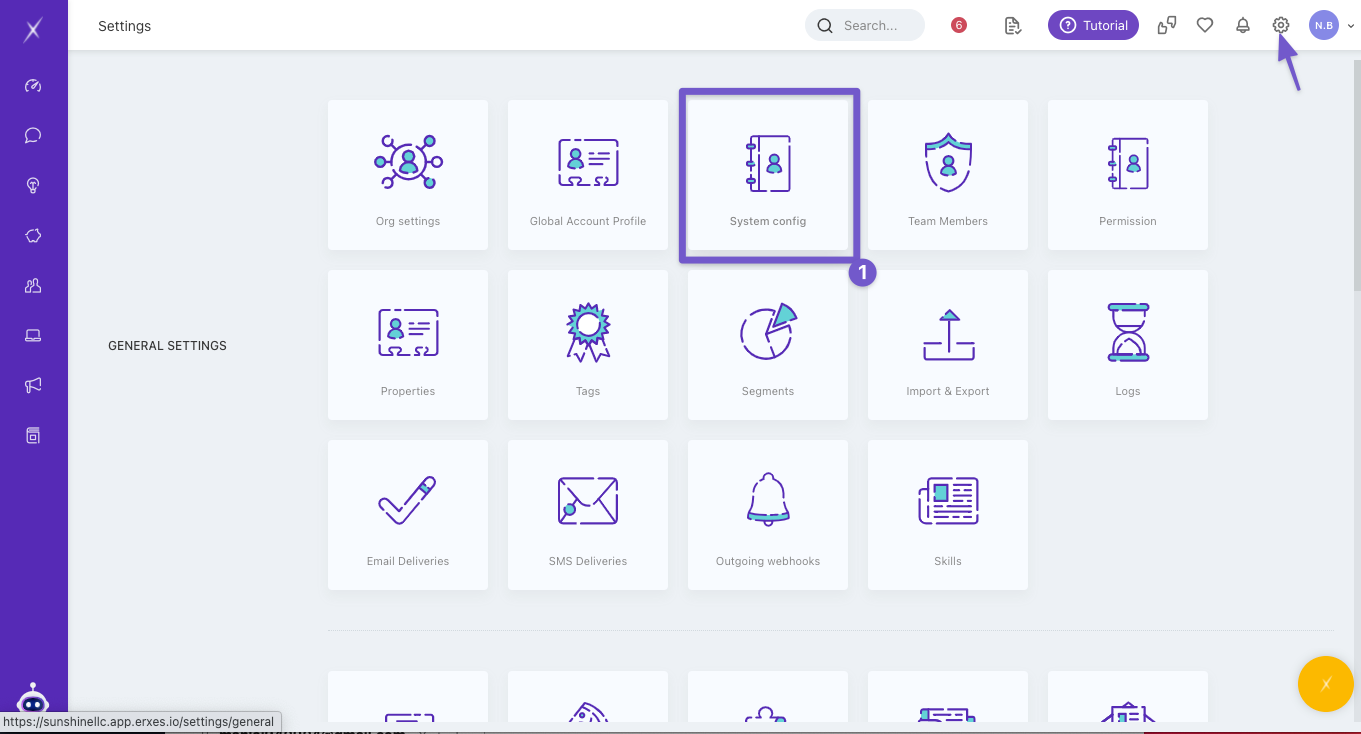
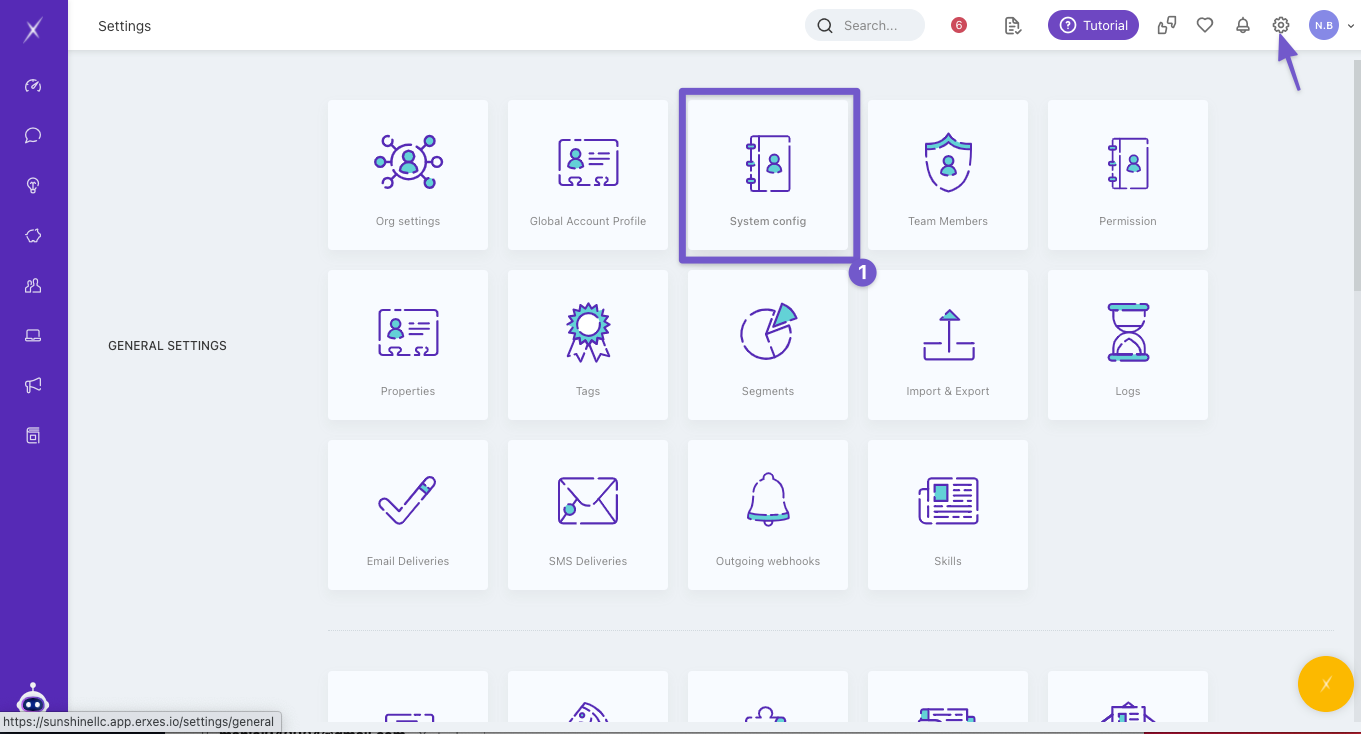
- Go to Settings and click on the ‘System config’ section.
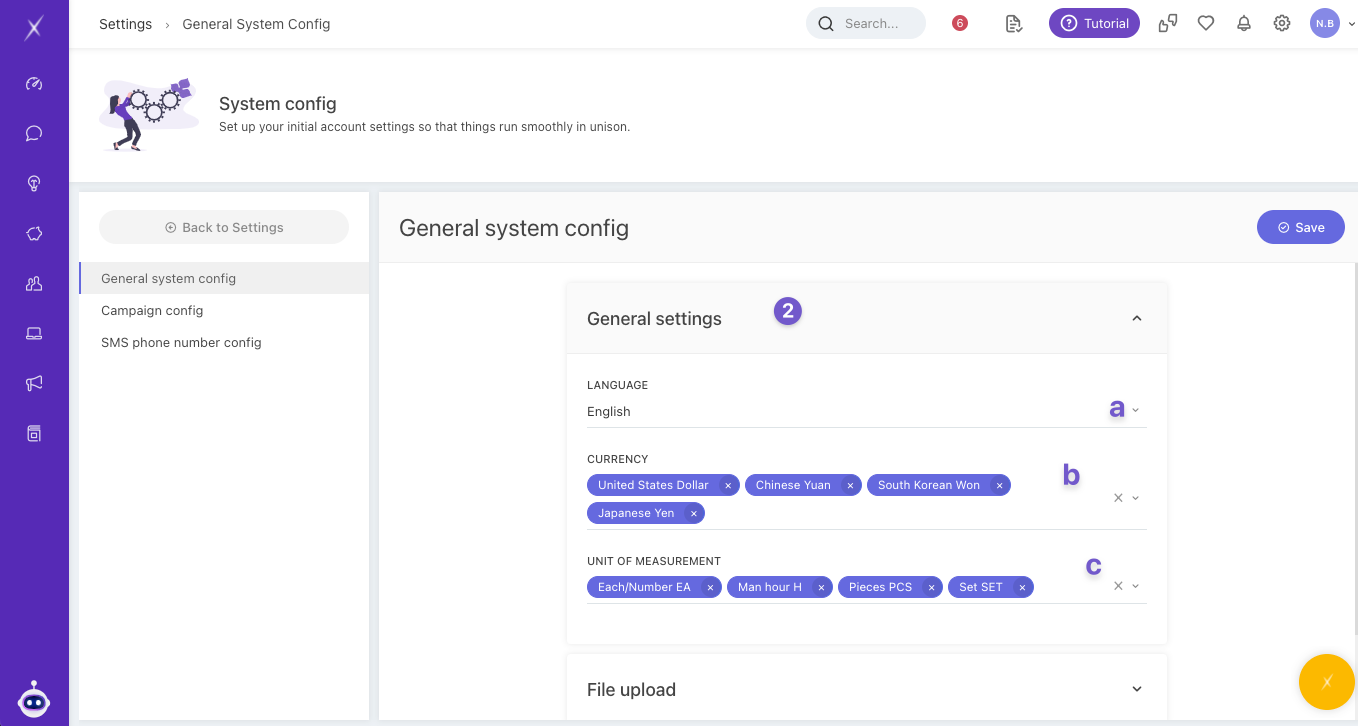
- Under the General Settings, you can adjust the following:
- Language
- Currency: Adjust the currency used to display your products
- Unit of measurement: Adjust the product counting units
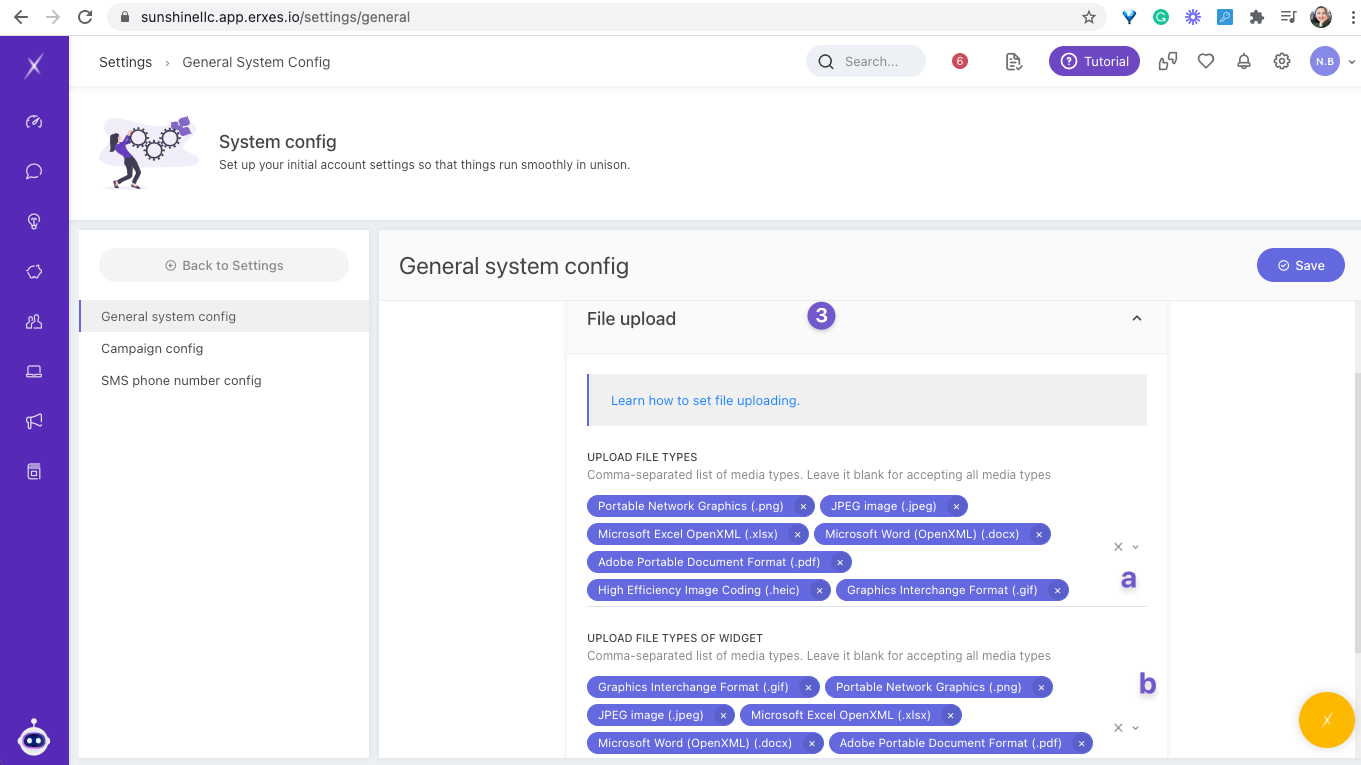
- In File Upload, you are able to:
- Upload different file types
- Upload file types of widgets: adjust the types of files that can be attached when a customer is uploading files into the Messenger and Form.
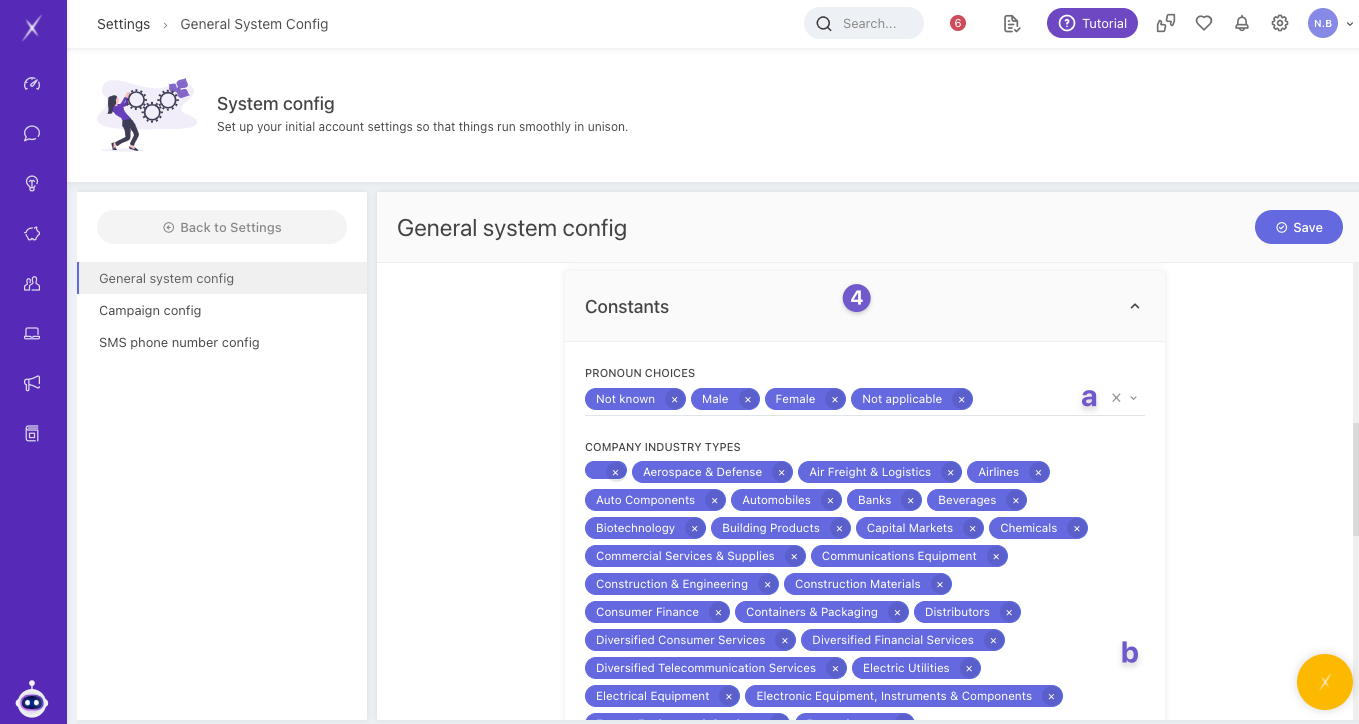
- In Constant, you can adjust the following:
- Pronoun choices: Adjust your preferred pronouns.
- Company Industry types: Specify the industries in which your organization operates.
- Social Media links
Automate email campaign configuration
The Campaign feature allows you to send bulk messages to your Contacts. One of the options that you can do for a marketing campaign is an email. For mass emailing purposes, you can either
- send emails with our build-in feature or
- connect your own AWS SES account.
Depending on your subscription plan, a limited number of emails can be sent per month through the Campaign feature.
- If you're choosing the first option, you can proceed to the next step by ignoring step 1 & 2 completely.
- If you wish to connect your own AWS SES account, please try here for more information.
- Click on ‘System config’ found in the General Settings
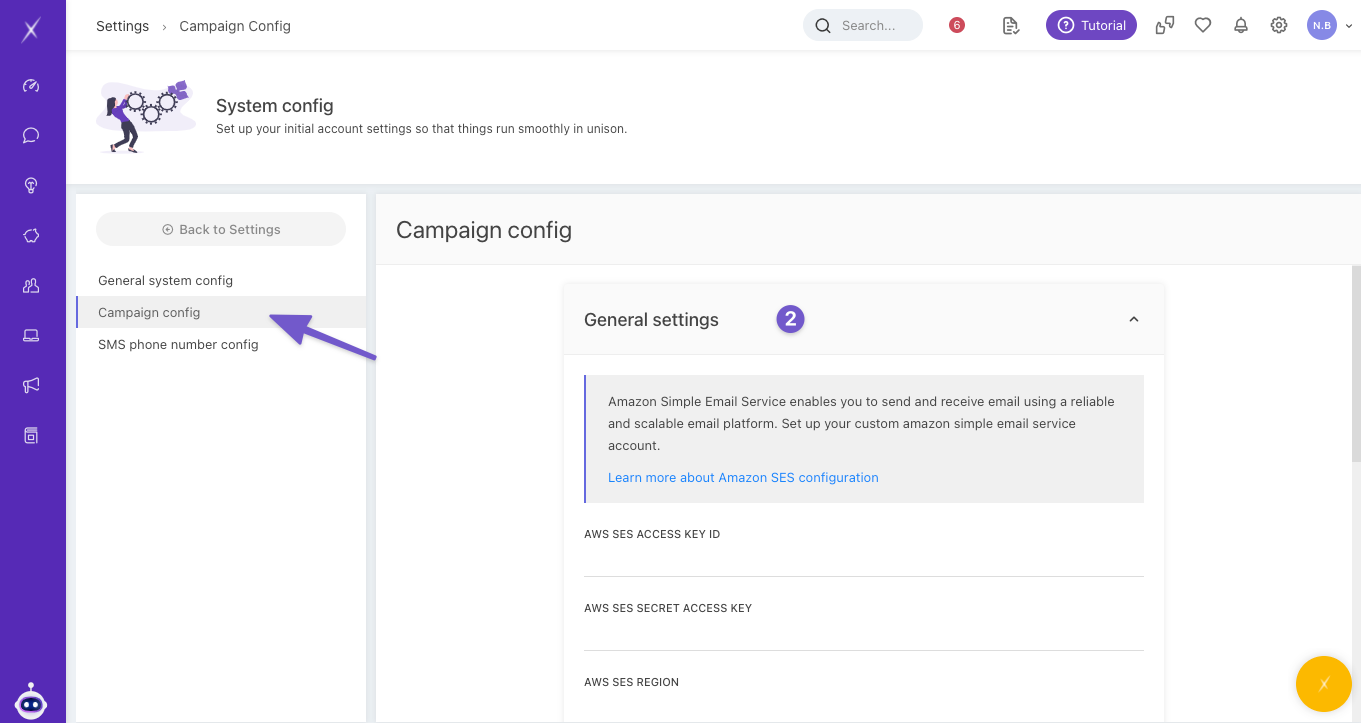
- In Campaign config, click on the General Settings to change the following settings with your AWS details:
- AWS SES ACCESS KEY ID
- AWS SES REGION
- AWS SES CONFIG SET
- UNVERIFIED EMAILS LIMIT
- ALLOWED EMAIL SKIP LIMIT
- CUSTOMER LIMIT PER AUTO SMS CAMPAIGN
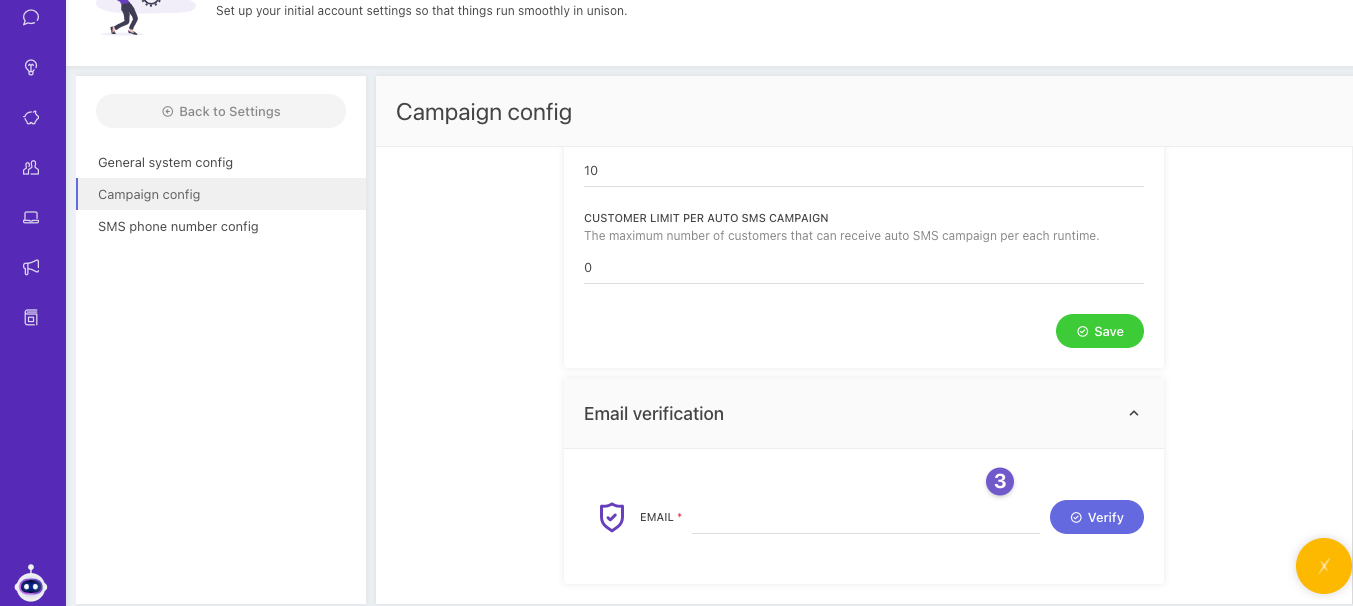
- In the Email Verification section, you will need to specify an email address that automatic emails will be sent from on behalf of your organization.
- In the email section, add in your email and verify.
- Once you have confirmed the confirmation email sent to your specified email address, the verification is complete.
Please note that verified email address is registered and to be active within your team members lists. Find more information about inviting team members from here.
SMS phone number configuration
erxes allows phone calls to be one of your integrated channels to communicate with your clients and implement marketing campaigns through SMS in countries such as the United States, Canada, United Kingdom, and Australia. By completing this process, you will be able to send text messages within the countries mentioned above.
- Purchase phone number by going to Global Profile where you can access to add-ons. There are two ways to access the Global Profile:
- either go to Settings on your erxes and click Global Account Profile
- or go to https://erxes.io/organizations and sign in with your username and password.
- Go to Settings - System Config - SMS Phone Number Config - Choose the country that you would like to claim a phone number in and choose its state or region. Copy the phone number and click the claim this number button. As soon as you do this, you’ll get a confirmation that your phone number has been claimed. The next step is to verify your phone number because claiming is not the final stage. The claimed phone number will already be added to the phone orders list.
- Verify your phone number by click the “verify phone numbers” button which is in green color. After the phone number has been claimed you’ll be able to send one way SMS to your contacts. To create a two-way SMS, please go to your Settings - and click the SMS integration. The verified phone number will show up while creating the integration. Please name your SMS integration and tie it to a channel & brand which is the final step that will allow you to use the two-way SMS on erxes.