Advanced setup
Advanced steps to install scripts. Erxes let you enable to track all possible customer fields from messenger.
Get data from your web app (for logged-in users)
Step 1:Copy messenger install code.
Go to Settings menu => Appstore.
Click on the “Appstore” menu (see the below figure).

Then choose your messenger and click on the install code button from the right side (see the below figure).

Copy the code (see the below figure).

If your website is single page app then you can choose a single-page app and copy the code (see the below figure).
Step 2: Paste the code in the bottom of the body tag (see the below figure).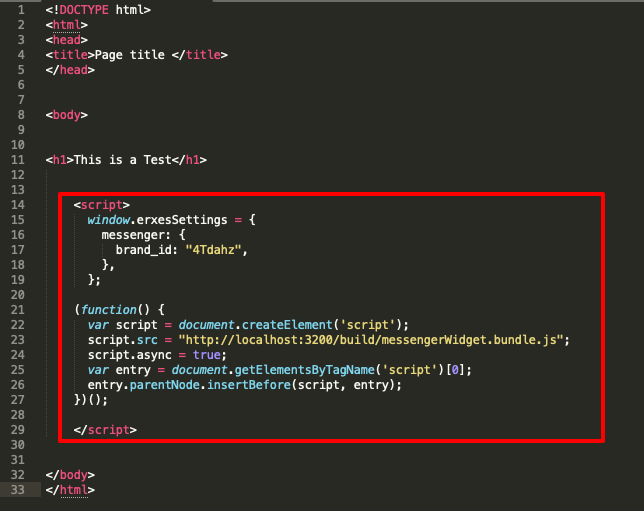
Step 3: If you want to get user information automatically, you can insert additional fields under brand_id in your messenger script. Insert the messenger script in your web body section. :
<script>
  window.erxesSettings = {
    messenger: {
      brand_id: "sNbKdZ",
      email: 'email1111@yahoo.com',
      phone: '88833331111',
      data: {
        avatar: 'https://cdn1.iconfinder.com/data/icons/female-avatars-vol-1/256/female-portrait-avatar-profile-woman-sexy-afro-2-512.png',
        firstName: 'firstName1111',
        lastName: 'lastName1111',
        birthDate: new Date('2020-01-01'),
        sex: 1,
        emailValidationStatus: 'valid',
        position: 'position',
        department: 'department',
        leadStatus: 'working',
        hasAuthority: 'Yes',
        description: 'bio',
        doNotDisturb: 'Yes',
        code: 'id',
        'links.linkedIn': 'http://linkedin.com/test',
        'links.twitter': 'http://twitter.com/test',
        'links.facebook': 'http://facebook.com/test',
        'links.github': 'http://github.com/test',
        'links.youtube': 'http://youtube.com/test',
        'links.website': 'http://website.com/test',

        // custom fields ===========
       // createdAt is reserved field
        updatePlan: new Date('2020-04-25'),
        plan: 'paid',
      },
      companyData: {
        name: 'name',
        'links.website': 'http://website.com',
      },
    },
  };

(function() {
  var script = document.createElement('script');
  script.src = "http://localhost:3200/build/messengerWidget.bundle.js";
  script.async = true;
  var entry = document.getElementsByTagName('script')[0];
  entry.parentNode.insertBefore(script, entry);
})();

</script>
CopyCopied!
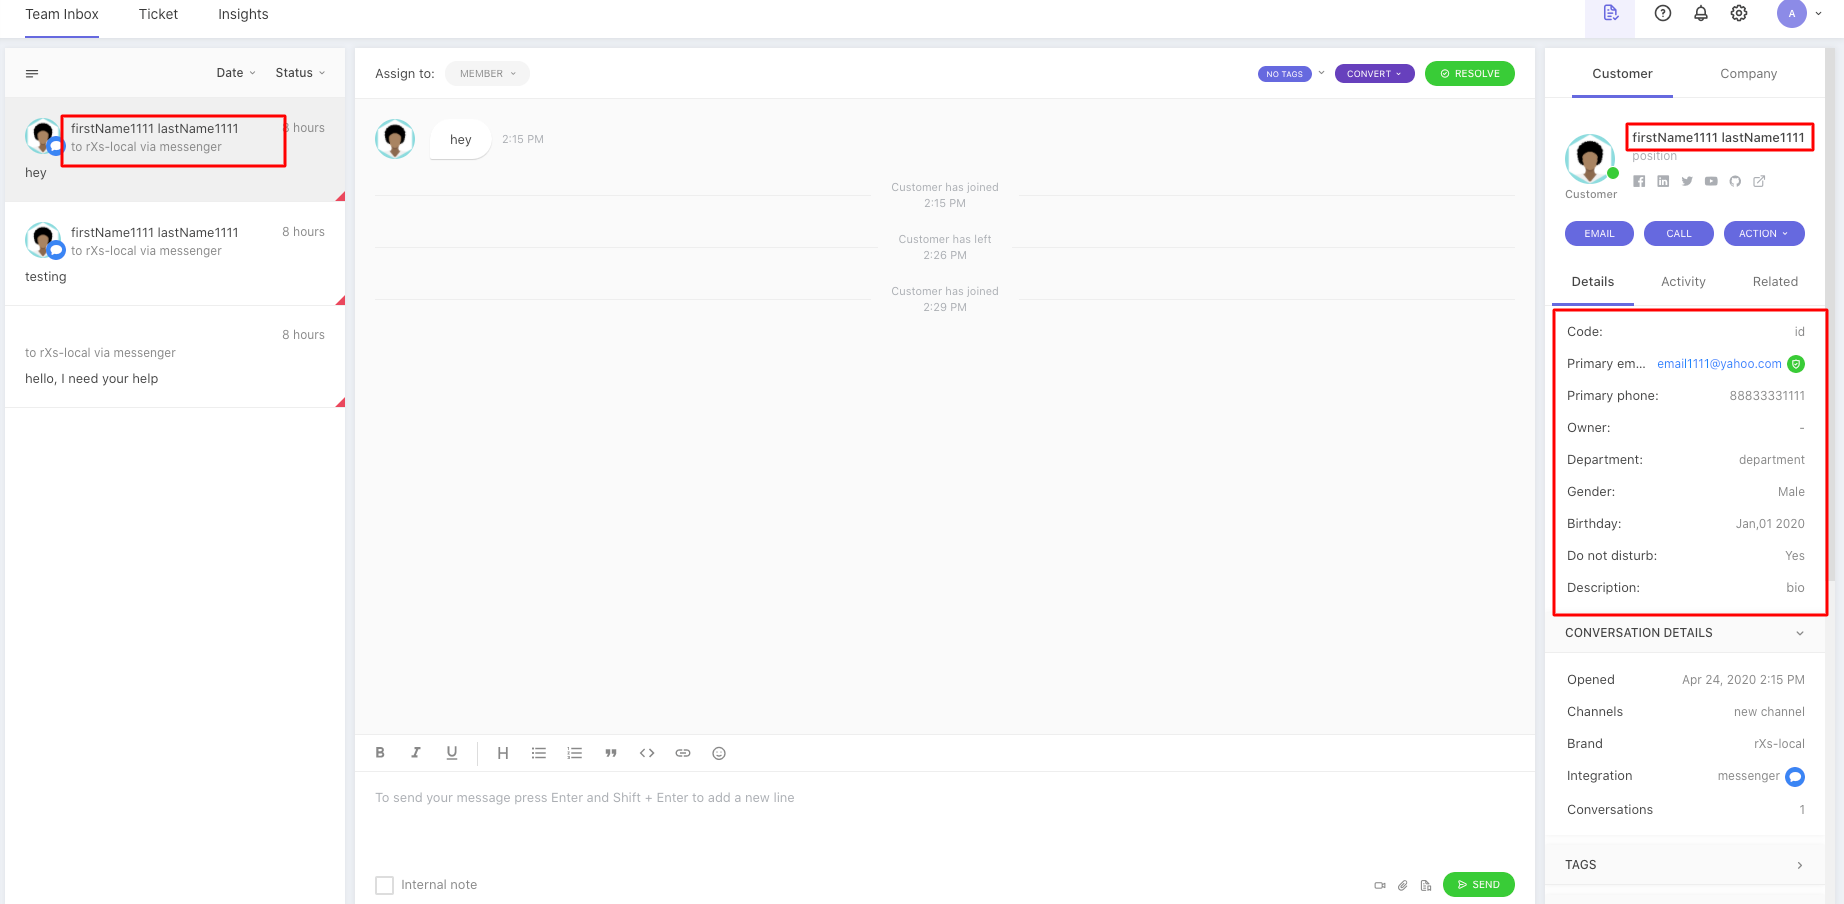
Step 4: As you can see the user details, all value will be automatically displayed on each field on user profile.
Step 5: Check the custom fields value, it is shown on Tracked data field on left down side.
(see the bellow figure).
       // custom fields ===========
       // createdAt is reserved field
        updatePlan: new Date('2020-04-25'),
        plan: 'paid',
CopyCopied!
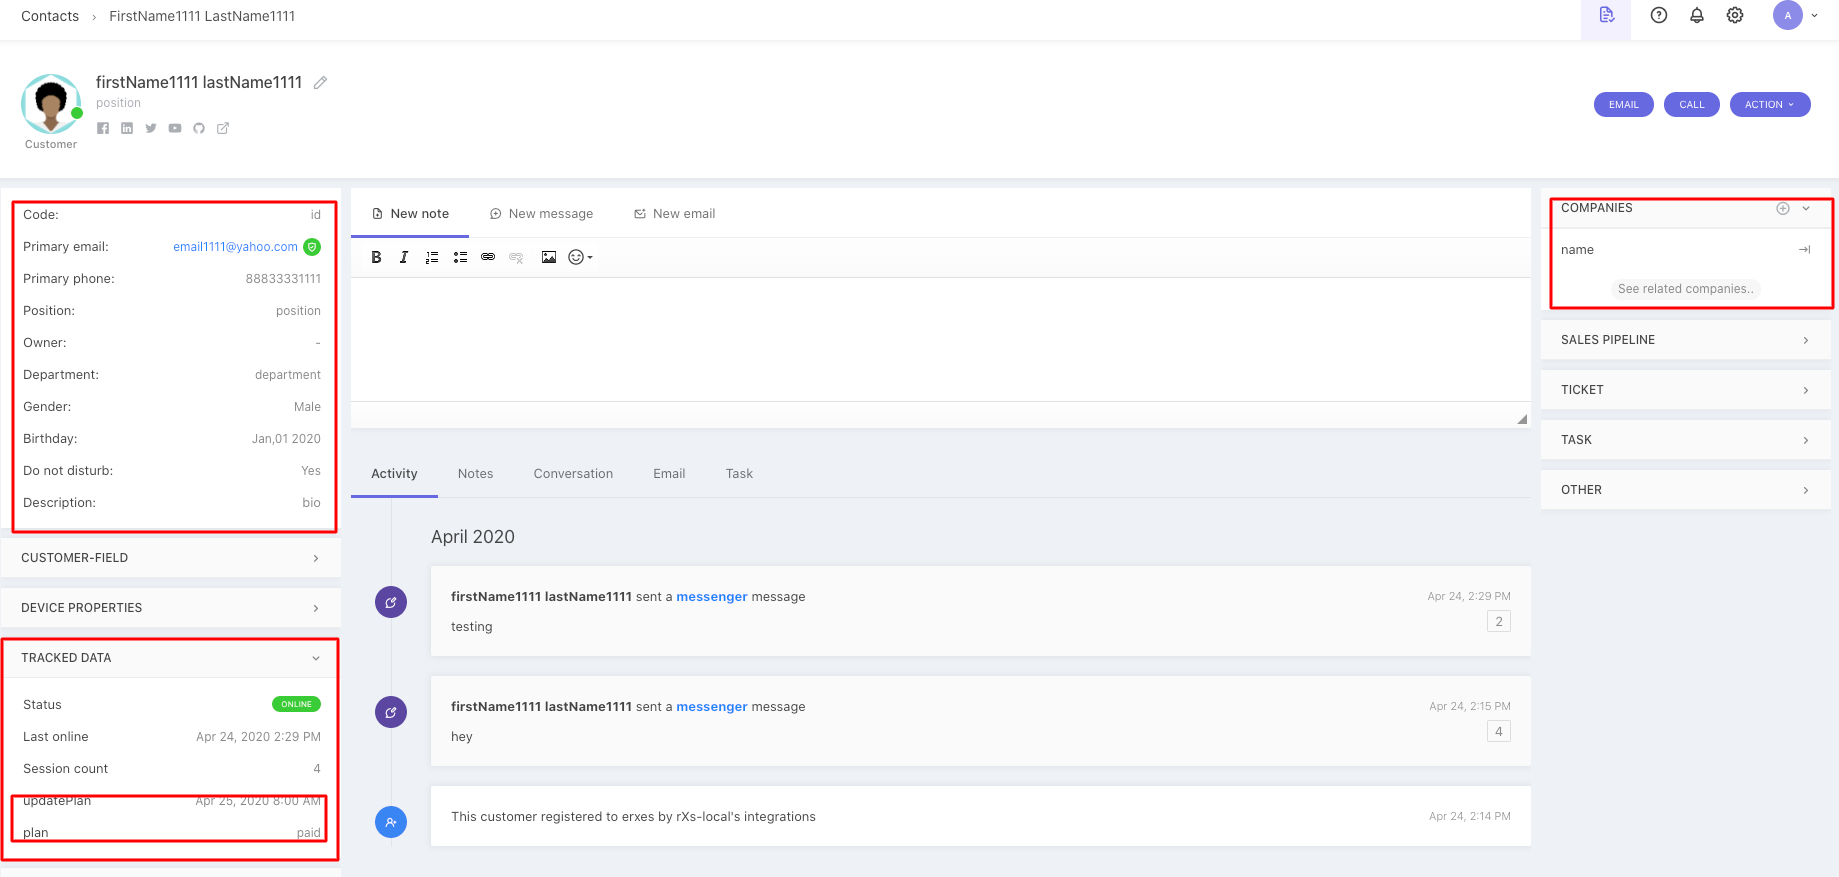
Step 6: Check the companyData value, it is shown on Companied field on upper right side.
(see the above figure).
companyData: {
        name: 'name',
        'links.website': 'http://website.com',
      },
CopyCopied!
If you want to get any data of your Web app automatically. You can just write in your source code inside the data section. It will be shown on TRACKED DATA section.