With erxes Messenger, you can have live direct chats with your customers regardless of where it is implemented. The features and benefits that come with this live messenger include:
- Your organization will be able to answer web page visitors enquiries quickly and efficiently.
- Once a web page visitor is logged in, they can be seen as live in your organization's online application. This also helps your team members answer questions in a timely manner while the visitor is still online.
- You can share potential customer information directly with the sales, core operations, and/or customer service teams on the erxes system to save time and answer questions accurately and effectively.
Creating an erxes Messenger allows your team members to communicate directly with your customers regardless of the source of enquiry as they are directed to erxes’ inbox. The messenger can be set up by the following steps:
- Create your own messenger with your organization’s brand preferences on the erxes system.
- Implement your embedded messenger where required through your website’s system.
- This step will require the help of a tech team. Contact your organization's technology specialist or a erxes customer service specialist for assistance.
For more information on implementing your messenger after completing the above steps, see the Messenger Layout section in the Configuration section. Once you've done the above, check out Messenger layout in the Configuration section for more information on how to deploy your messenger.
How to create your erxes Messenger
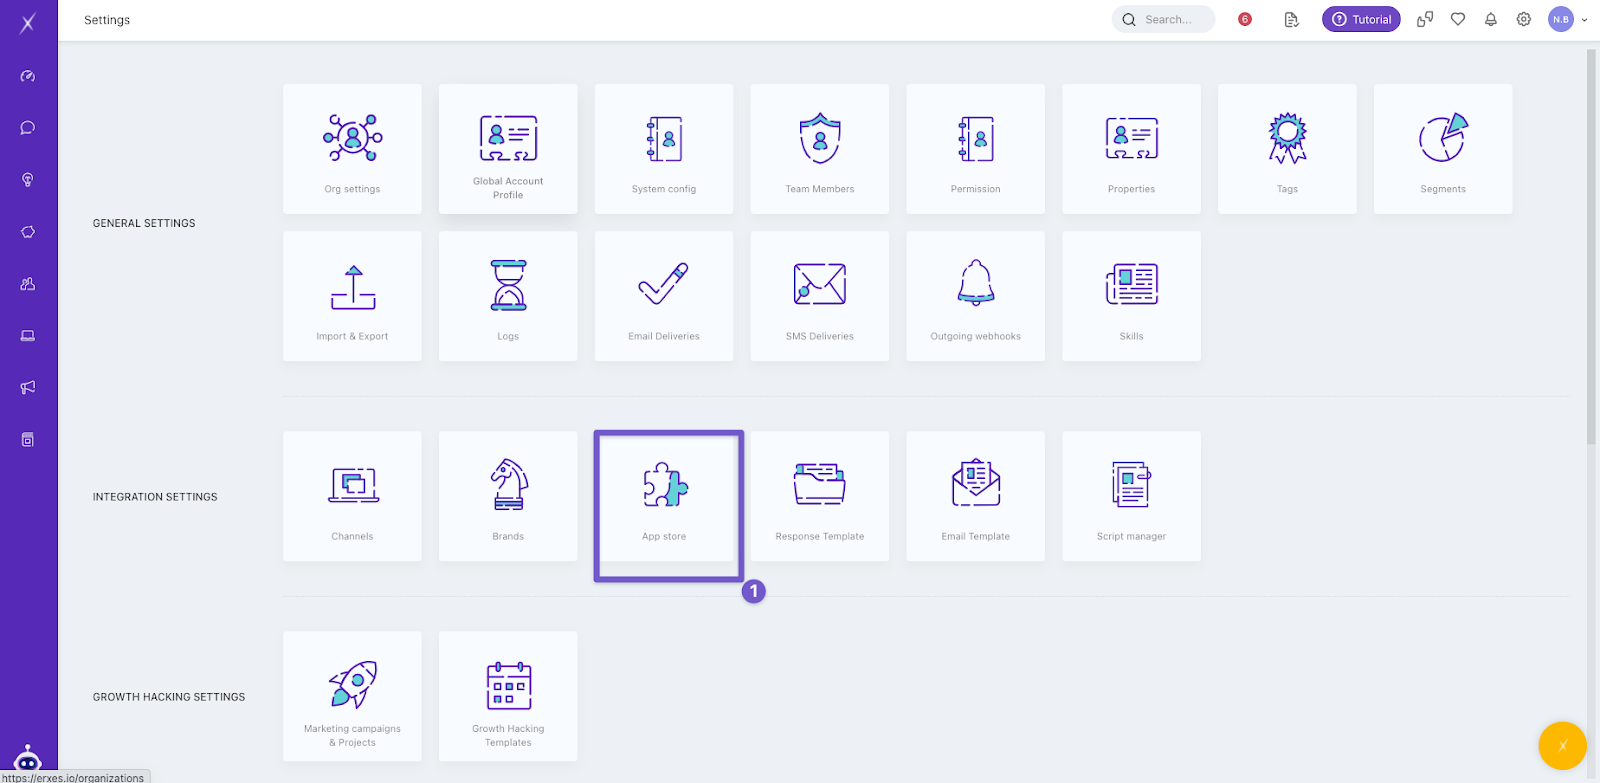
- Click on ‘App store’ in the Integration settings.
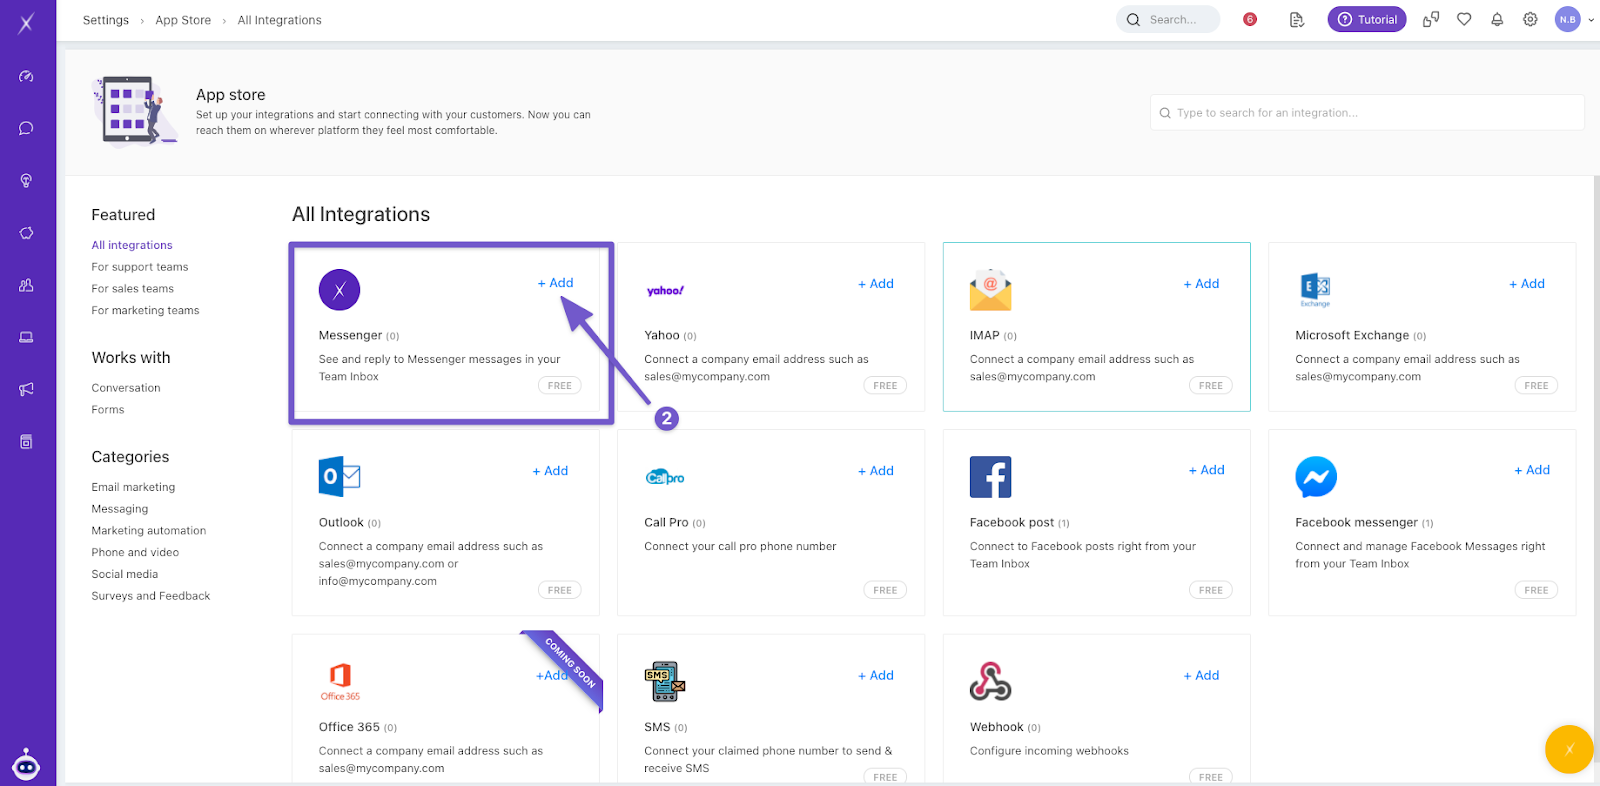
- Click ‘Add’ next to the Messenger section with the erxes logo.
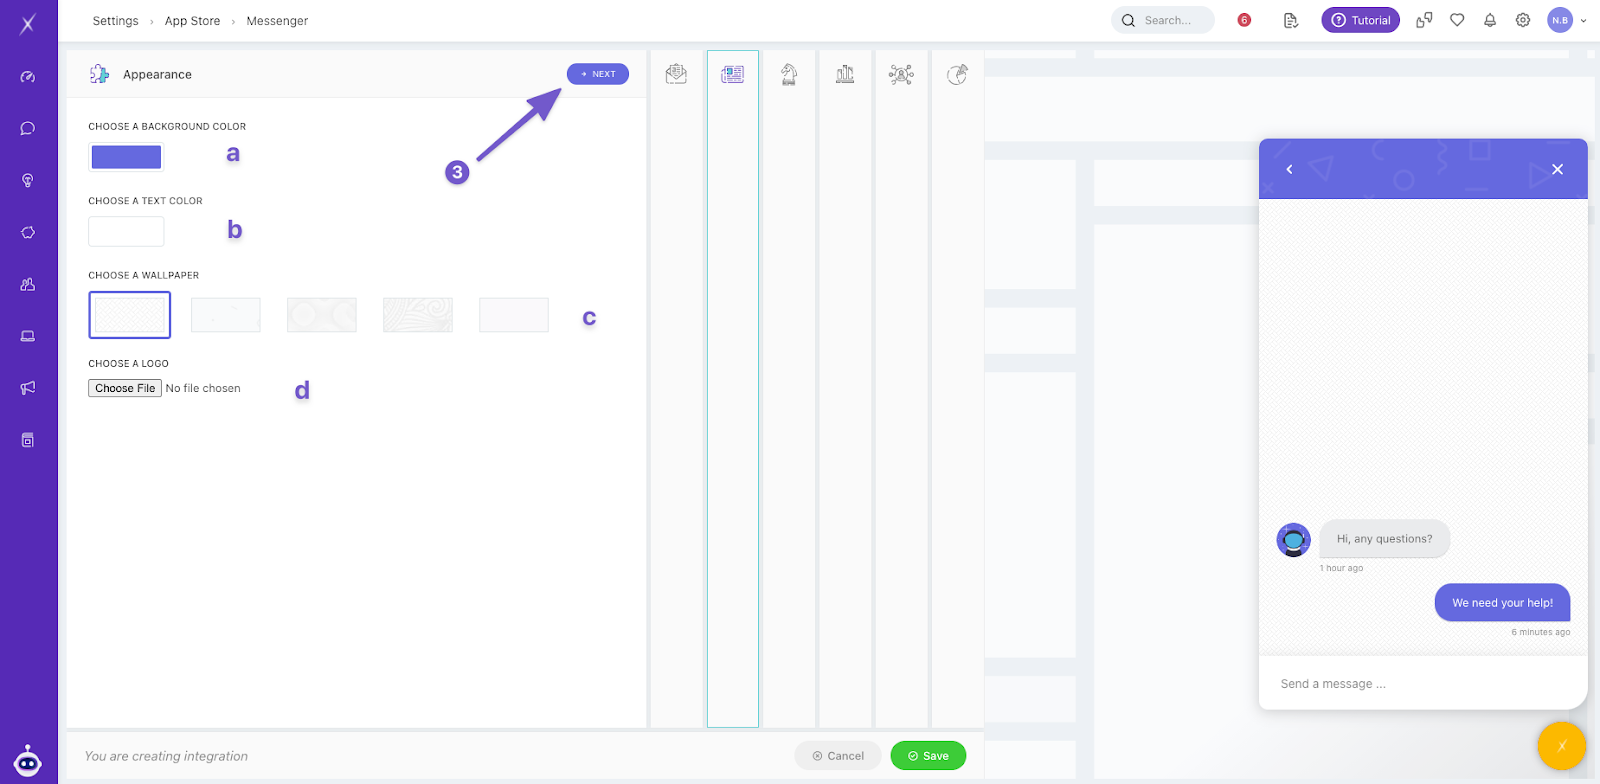
- Adjust the appearance of Messenger on the Appearance screen. You will be able to see how the messenger will look on the side.
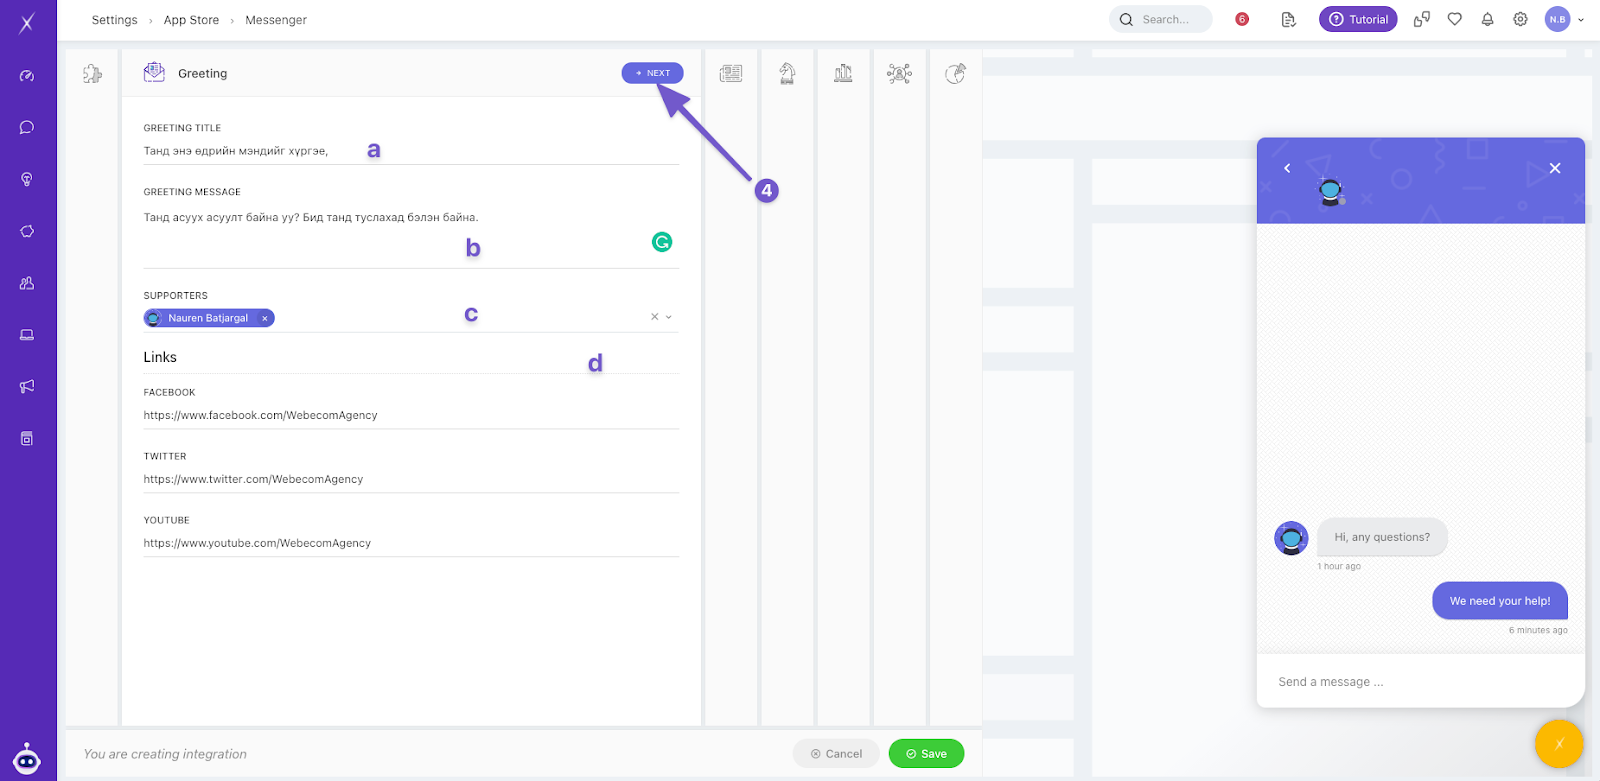
- In the Greeting section, you will set up the Messenger’s greeting. Fill in the greeting title, message, supporter answering the enquiry and links to your organization’s social media.
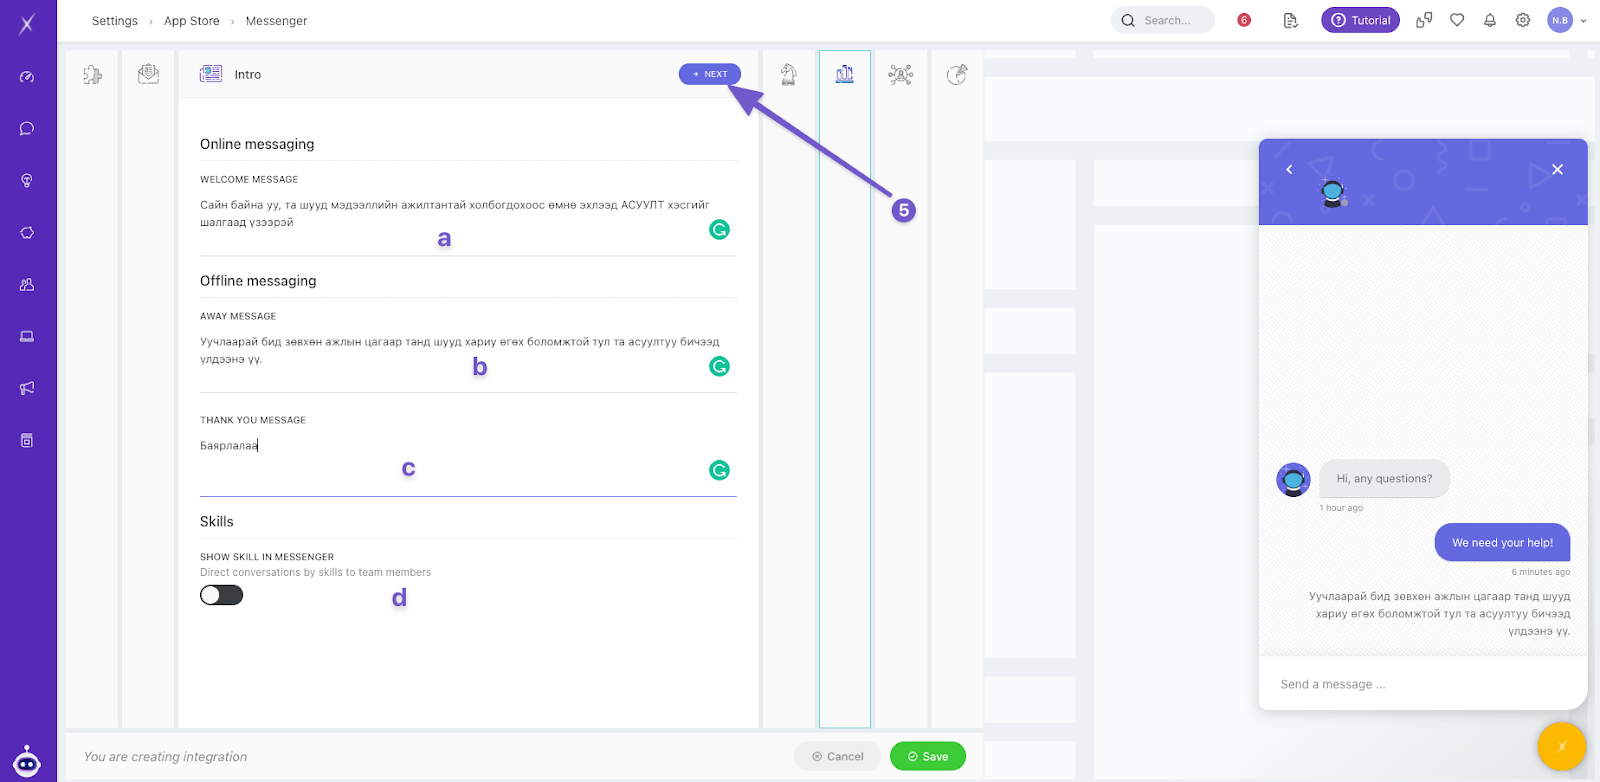
- In the Intro section, you will set up the phrases that appear when Messenger chat starts.
- Fill in a welcome message you would like customers to see when you’re online.
- Fill in the away and thank you message you would like customers to see when you’re offline.
- Switch the ‘Show skill in messenger’ to easily see if directing a conversation to another team member is appropriate. For example, if you receive an enquiry in French, you can direct the enquiry to a French speaker.
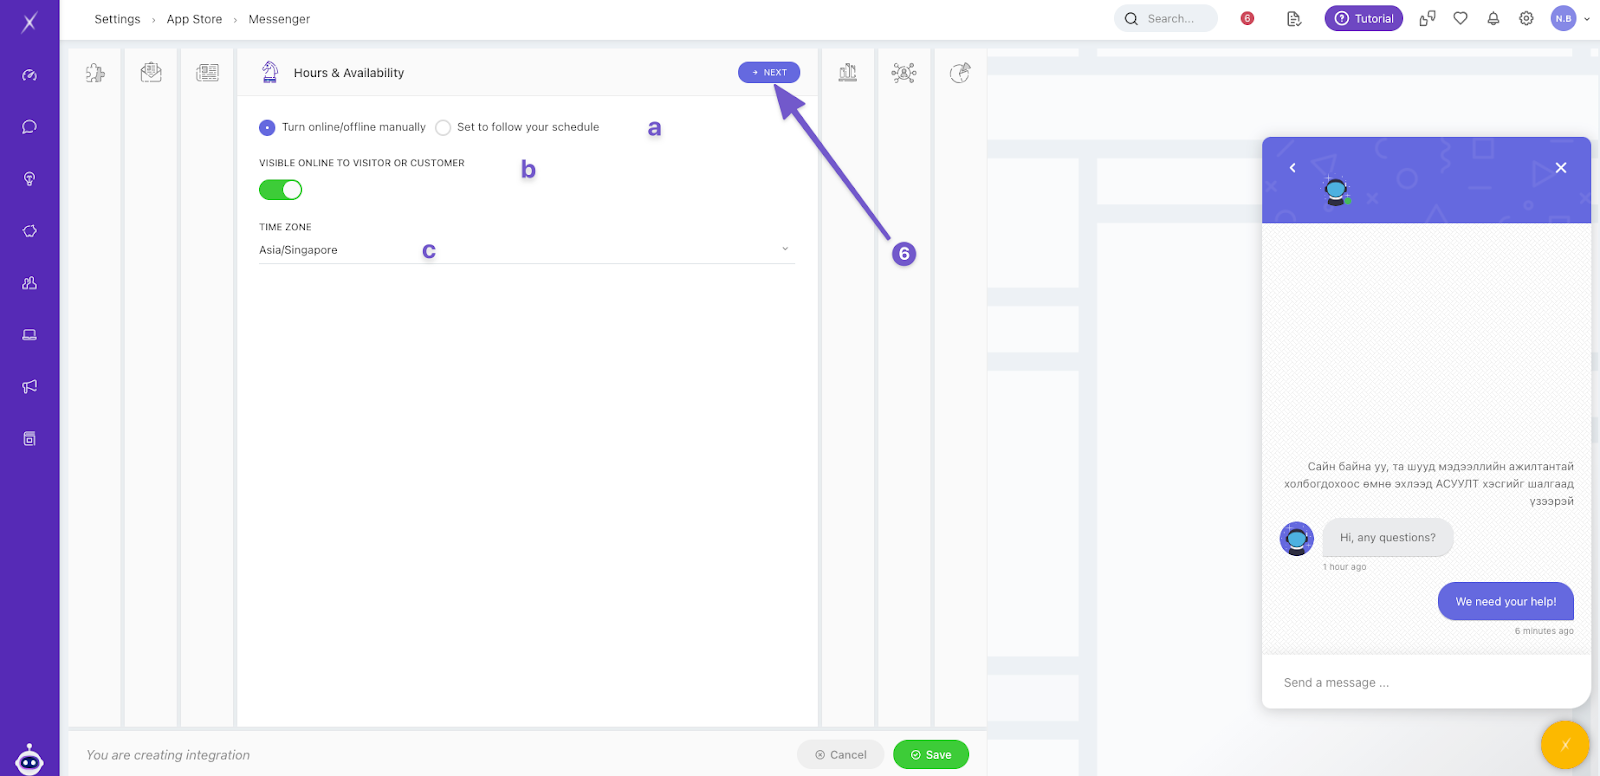
- In the Hours & Availability section, you will adjust the Messenger running time setting.
- You can adjust your online visibility to visitors by choosing if you would like to turn online/offline manually or set for your online status to follow your schedule by adding in your online hours and time zone.
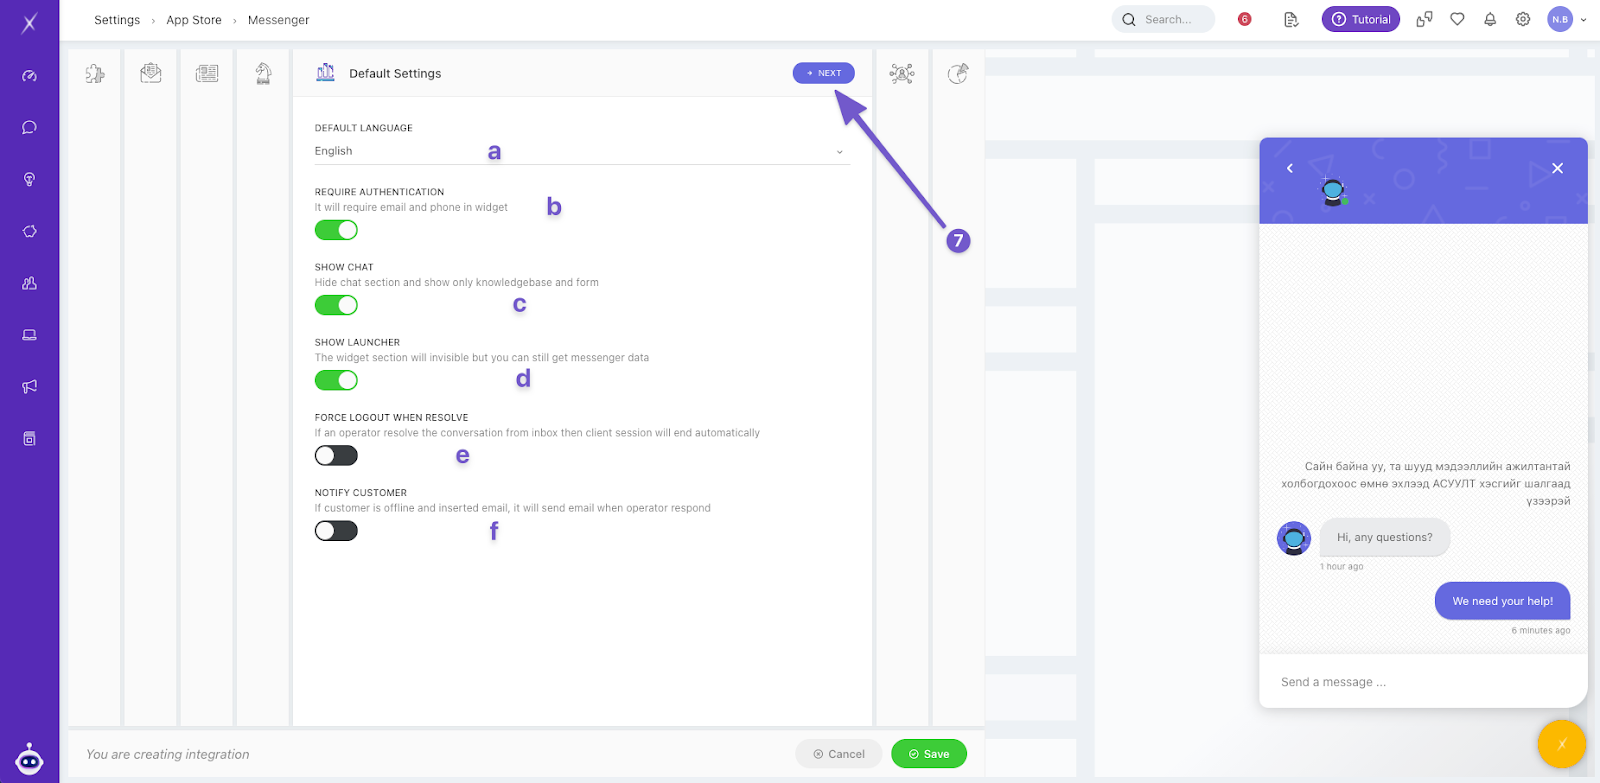
- In the Default settings section, you will adjust the general settings for the messenger such as the default language.
- You can choose if you would like to require authentication, show the chat, show the launcher, force logout when the enquiry is resolved, notify the
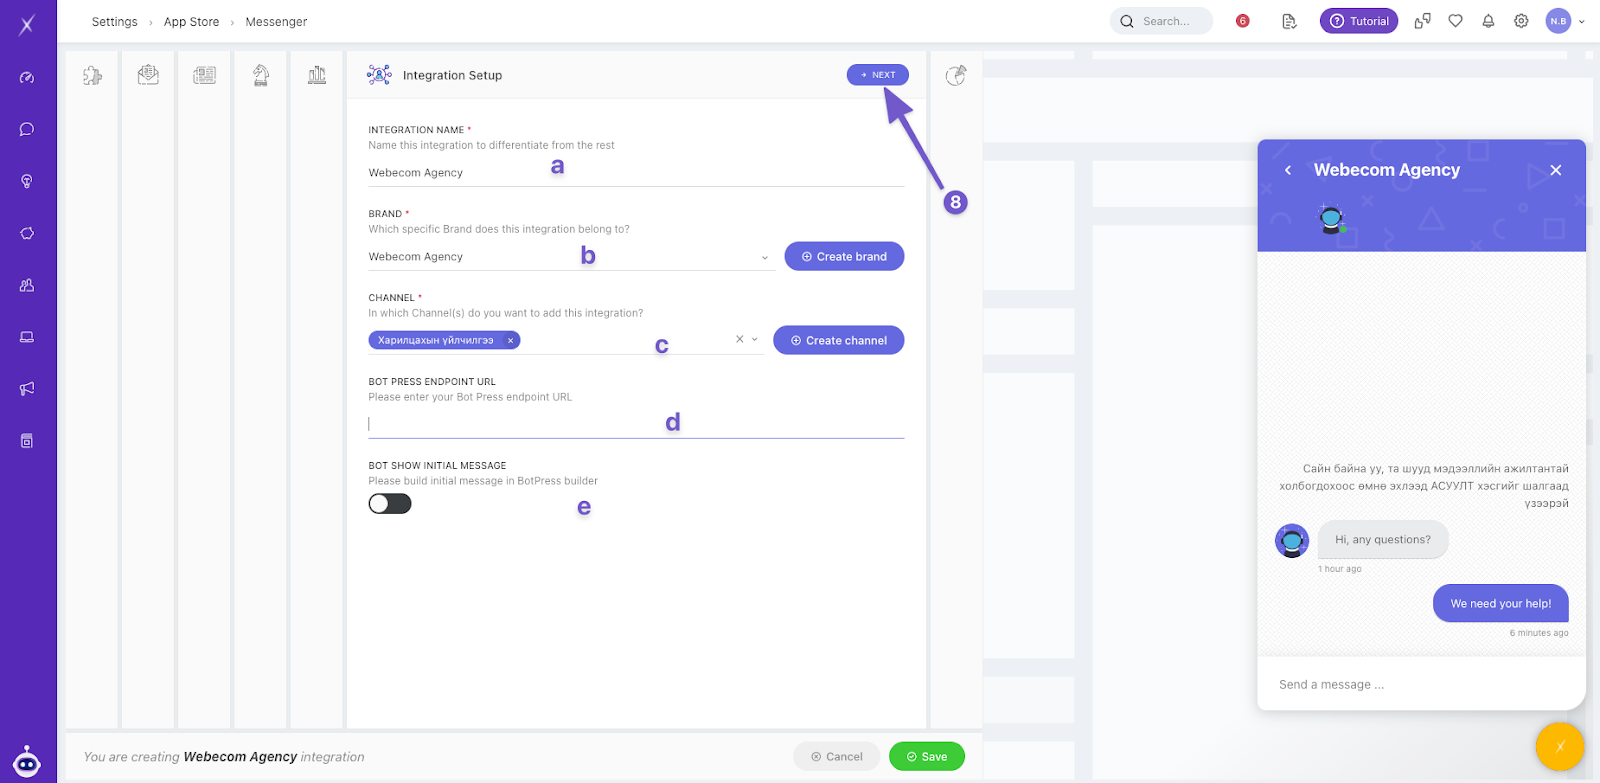
- In the Integration Setup section, you will fill in information about the messenger. By filling in these steps and clicking Save, you will have successfully created your erxes Messenger.
After this process, you will need to contact your tech team or an erxes customer service specialist to add the messenger onto your website.